I have designed my blog to display my card making, scrapbooking, mini albums and any and all paper crafting and STAMPING!! I want to discuss anything to do with all these things and play with my passion here!
Showing posts with label birthday card. Show all posts

Friday, October 21, 2011

Kind reminder to update!

Hi all,
Yes I am that "bad" blogger who does not update regularly.  I admit my fault! Although,  in my defense I have been quite ill as of late and not doing much of anything. No matter how I feel art is always on my mind.  I dream in technicolour! Well I wish I was..............a girl can dream of dreaming!! Art rarely is far from my thoughts.  I have made some items since my last blog post about the Canadian Scrapbooker Carnival. (I still have to finish the projects before i post the pictures of them, so no update there yet  sorry? )

I have created a few ATC's and a birthday card for my youngest brother.  I will post what work I have taken pictures of as of late.  I have a couple of ATC Jams completed that I forgot to photograph before sending them back out into the big bad world of postage.  Not pleased about that as one of them I LOVE but it will be coming back my way soon....I hope.....you never know with Jams as they can disappear for a long time into that postage oblivion! 

On to the pictures!!

Asian Atc
  
Asian Atc Jam


 This Jam was created with the Jams Galore group with the Google online group.  I was sent this card as the third person in the swap. I received it with the Asian background and the neat double swan stamp on the card.  All the rest was added by myself.  I made some Asian glitter letters that I edged with some distress ink as well as the Asian emblem and flowers.  I was not satisfied with that being enough so added a transparency with some bamboo stamped onto it in green Stazon ink.  I put it onto the card using an eyelet so that it can swivel on and off the card. I was quite pleased with how this turned out.  I think it is a well rounded and complete card.  I hope the others in the group like my additions.  The first artist in this swap is Joy O. and the second is Peggy B.  This is my first collaboration with both artists. 

All three Asian Atc's transparency covering the atc


Art Deco Ladies
Art Deco Lady Atc Jams Galore set 


 This has to be a favorite jam of mine!  I fell in love with this one.  The amazing background created by Elaine B. and the incredible addition of the inchies on the side by Cheryl F. really created a fab canvas for me to add to.  The art flowed out and I found it easy to pull together.  Some are easy others are a stretch.  If they sing to you they sing to you!!  I added the glitter around the inchies and the art deco lady.  I coloured her in with my prismacolor pencils and added a layer of Glimmer Glaze (by tattered Angels) in the colour penny loafer.  I put a ribbon on her back to be an addition to her dress.  I put the beads on the left side ( they were originally a fab score from a dollar store as they were all part of a headband that I cut apart!! ) and added the gems on the right side.  It was just a treat to work on!!
    
One of the Atc Art Deco Lady Jams
 Photographic Studio Atc
Photograph Studio ATC Jams Galore card 2


This set of Atc's was pure and utter pleasure from the moment I opened the envie they came in!! I got this one as the third artist in the jam.  I added the steampunk man (I stamped him then covered him in glossy accents and added a bunch of old watch parts) then added the gold glitter around the film strip and the corners.  I also put the copper edging around the card.  I got this one in such amazing shape I really did not have to add very much to it.  The background was done by Marcie L and Hollie F did the photograph studio stamped added title (which I coloured with a glimmer glaze) and the totally amazing pics and film strip on the left side of the card.  I mean really......... how do you add to such incredible work??? I did but I hope it is received well. 


Photograph Studio ATC Jams Galore card 1   


All 3 Photograph Studio ATC's


Amazing Paint Background Atc

Atc Pocket Artists group jam

 I really don't have a good title for this ATC but I love the colours!! I got this one from a new group that I joined called Pocket artists and it too is a Google group where the artists will trade atc's, post cards, tags and any other form of art we wish to trade!! It is a great group of dedicated artists.  I received this amazing painted background from Sue S.  I was totally in awe of the incredible painting that this background has!! I was stumped by what to do to it.  I have been doing a lot of dimensional art as of late and added a lot of bits and bobs to this in the hopes of doing it some justice. I kept with the purple theme and added all of the purple goodies on the right hand side of the atc.  Hope it is liked!! I have sent it on to Hollie F.  I can't wait to see what she does to it.


close up of this atc


 I met a fab, honest and real lady on Ustream a few months ago and have become quite good friends with her.  She is a real angel.  She has told me some art themes and items that she likes and I have sent her a package of goodness!!  She told me she loves fall so I added a huge bunch of spellbinders leaves that I first stamped and then cut out using the big shot and a spellbinders die.  Oh boy that was a chore!! Done with love though~  I really hope the leaves go to good use!!  I have no doubt they will be used in a few amazing projects.  I was coming up with so many as I cut them out~  I really don't care to see another leaf for a very very long time!!! Oh it was fun though don't get me wrong!  I loved doing it and I have not been very well lately so it was a relaxing non brain taxing job.  I made a million leaves I'm sure of it!!  This package has a lot more than leaves in it though!!  Some lace and many other goodies are in the box.  I don't like to send packages without some art I have created added as well.  So I made the two following ATC's and the tag as well.  I really hope she likes them.  Since the package was sent yesterday this is a sneak preview of some of what is in her goody box!!
I really hope she likes~!~

Tag created with distress inks and stamping
close up of lace and glitter

ATC--Eclectic Junk


ATC--love and dream


My little brother had a birthday! So what does a card maker do?? hmmmm make a card?? YEAH!!!! I hope he liked it! It is always a challenge for me to make a masculine card.  I do like how this one turned out though. I played with fabrics and used a lot of enamelz embossing powders by Shimmers paints.  I also used Stampendous Frantage line of embossing enamels.  Lots of fun!  I love to play with embossing powders!! 
Happy Birthday Bro!!!


One of my art friends on Ustream lost her dog last month.  I know the pain of the loss of an animal.  I was so moved that I created a mini book in her dog's honour.  Dar I am sooo sorry for the loss your beloved Bonita.  Dogs are very special animals.  I know I would be totally heartbroken if my dog Charlie were to pass.  I realize this is nothing towards healing but I really wanted to express my empathy at the loss of a fur baby.

I have never done any Steampunk art before but I was informed by many that Dar loves steampunk.  So I tried and here is what I was able to create.  Please ignore the dog hair in the photos!!! Bad photography!!!

SteamPunk mini book front cover

Mini book back cover

front and back together...with dog hair in pic!! ahhh

detail shot of the front of mini the brass round part is a locket that a photo can go in 


 Dar did a you tube vid about the mini.  She was pleased to receive the gift in her dogs memory.  I really enjoyed making this despite the sad impetus behind it.  

Well that is all I have to update now but will find more to post soon as I have been kindly reminded in my last post that I need to updating more frequently !! I do, the comment was more than fair!! I only hope I can keep doing some interesting work to keep you interested and coming back to see more. Hope its an amazing weekend for all!!


Friday, August 26, 2011

My Beautiful Niece

Hi all,

Well I finally finished the entire package for my lovely niece.  I made a card for her as well of course!  It is a fun card which of course has the same colours as the fairy and art piece I created for her.  I was a little late in sending the package but it got there only one day late.  I sent the package via Express post and it took two days to get there.

'The Birthday card''
 I had fun making this card!  I used Tim Holtz distress ink daubers to make the background.  I added a huge background stamp by hero arts with script and butterflies.  I coloured the butterflies in with some LuminArte glitter paints.  I then added a dress form I had stamped in Versamark and put on some clear embossing powder and heat set...the stamp is by Close To My Heart...it is a fab set called 'Find your Style'. So love it!! After I heat set the clear embossing powder I added distress ink on with a foam applicator. A great resist technique in my opinion......I then fussy cut it out.  I dipped it into UTEE and made a glossy cover on top of it.  I had to add bling to it!!! Of course!!!   I put a bit of ribbon on the middle of the dress form for some dress fabric and then added gems on with my Imaginisce i-Rock gem applicator.  Love that tool.   I used Donna Salazar's Spellbinders die to cut out the butterfly in a silver paper.  I used another Spellbinders die to make the fancy label and stamped a happy birthday stamp on to the label. I think it just looks fab!! Some paper pieces from Once Upon a Springtime by Graphic 45 complete the look. 


Side/flat View

This is a side view of the card to show the depth and dimension of the card. I popped the dress form up with my wonderful Helmar zap dots. They stick like nothing else!!! Love 'em!!


Back of the card
 The back of this card is a post card type size of paper from the Graphic 45 paper.  Of course I added my name stamp!!

One last look


Reading the card
 I got some pictures from my brother of my niece as she was opening the birthday package and card that I sent to her!! I love her face!  It is so nice to get to see her reaction after all the work I put into this present for her.  I LOVE her smile!!! It makes all of it worthwhile!! That smile is worth more to me than any amount of money in the world!  I love this little angel!! She is an incredibly smart and already very well read intelligent young lady!  I can't believe she is this big already.  I feel like she was just born yesterday!!


Reading the 'second card'
 I sent a second card with a label in it so that she could name her fairy in the bottle and I added some ribbons into the card as well so that she could attach it as she pleased! Again with that smile!!


Fairy in hand!!

Oh my!!! Now this is worth every single minute of work.....and there were many many hours put into this art piece.  She is so precious to me.  I hope she knows this!  I don't get to visit as much as I'd like to due to our respective home locations.....there are about 3500kms between us.....Ontario to Calgary it's a long long walk...........I hope that she keeps this forever  and can pass it along to her wee ones....she did state to me on the phone as she thanked me for the gift that she was going to keep some of her dolls and toys for her children and give some away to other children.  So generous and thinking of others already.  As I stated a little angel and a very special niece!!  My hubby and I love her.....as of course does the rest of the family.  She is my parents first grandchild.  My first niece and just a spitfire! I love you so much!!!


Now on to an ATC JAM that I have set up and started to send on for two others to work on!


Watercolor oil pastel ATC Jam starter!

I sent this set to an ATC Jam trader in Finland.  I wanted to send a set that was NOT a bit of pattern paper!  I started by adding a wax resist crayon using a stencil.  I then put some glitter spray from Tsukeniko on and finished by using my new Staedtler watercolor oil pastels.  Oh wow oil...water...yeah it works well the pigment is fun and great to work with....not the best pigmented pastels but fun to play with. Love that resist technique!!

Well that's it for this post!! I will be posting after this......I made an ATTEMPT at an art journal page..... yes an attempt!

Friday, August 19, 2011

Neglectful Blogger.....

Hi all,
I have been one very, very bad blogger.......oh dear....I have soooooo much to share!!!  I have not been doing much on the blog but I have certainly been creating things.  I have been playing a lot recently with mixed media and am going to begin this journey by creating an art journal.  I was turned on to the wonderful world of mixed media by one of my crafty pals, Sandi.  Thanks Sandi!!

This world has taken me to UStream and oh boy is this a wonder of wonders! I can't believe how amazingly talented the people I have been following are.  The tips,tricks and art that they broadcast and create are amazing!  If you do get to UStream I am gibbrn and the crowds I follow will help you to find the videos that I have been watching.  One person in particular that has caught my eye is JournalArtista.....aka Paula Phillips.  Her art is just soooooo inspiring...thanks Paula!!  You can find her work here.....http://www.journalartistaart.com/  Paula's site is full of amazing finds!  Such creativity is just infectious!!!  It will take hours of your time should you venture to her site.   I have recently purchased Paula's DVD from Cloth Paper Scissors.  The direct link to her instructional DVD or a direct download....no need to wait for shipping, Yeah! is here!  Layered &Textured Backgrounds: Art Journaling Tips and Tricks  Thanks for the inspiration Paula!!

Now on to what I have been creating.......

I made a couple of Father's Day cards.....
the first one is already posted (see prior post) it was for my Hubby's father.  This one is for MY Dad!!  I made a bookmark for my Dad too.  He is a very avid reader sometimes with more than one book on the go at a time.  I don't know anyone else who reads as prolifically!  My Dad is full of many, many, many amazing facts....he reads a lot of historic non fiction books and loves to educate our whole family with his new found knowledge. 

Front of Bookmark


I created this bookmark using only Unity Stamps.  I love my Unity Stamps!!!  The shape is cut with a Spellbinders Labels 13 die.  I love the shape!  I coloured the background with my (much loved) Tim Holtz distress inks in many colours.  I stamped the images and colured them with my Twinkling H20's by LuminArte.  They have amazing shimmer and pigments!  The background under the image has a text stamp to add a  'booky' feel!!   The ribbon under the die has a small washer in between the top of the two die cuts.  The washer adds a little bit of weight and helps to keep the ribbon in the right place.  I closed the ribbon with Glue Arts fabric adhesive.  This adhesive needs to be heated to complete the seal.  I used my ribbon iron and it stuck really well!!!  I don't think I could have pulled it apart if I tried!!!  The die cuts are put together with my favorite Helmar 450 quick dry glue!!  It is my "go to" glue for anything I need to really stick together forever!!!!!!!!  Love my Helmar!!!! Yippee!!


Back of Bookmark

The back of the bookmark is just as exciting.....I thought the sayings from Unity were just PERFECT for my bookworm Dad!!!  Okay..... so on the the card!

Dad's Fathers Day Card...He's a Real Fun-gi!! LOL!

This card was a lot of fun to make...the picture really reminded me of my Dad...or what I think he would have been like as a wee lad!!  I used a lot of distressing making this card. There are many layers and gain I used a Spellbinders labels to put my image on..  This is a La Blanche stamp.  I stamped it and coloured it in with Reeves water soluble wax pastels...amazing.  They were lots of fun!!  They are very like a water color pencil.   I added Robins Nest Dew Drops.  I believe they added some depth and dimension. 

lots of layers on the label ....used Tim Holtz Tattered Banners die cut out......

side on view....you can really see the glitter I put over the image.


I created a bag of goodies and a card for my girlfriend who was feeling under the weather.  I didn't get a picture of the bag. ((boo hoo))  However I did get a picture of the card!  I love it.  My girlfriend, Mary Elizabeth is a very creative spirit and a very accomplished, prolific and published poet.  She is now creating awesome quilts and always learning new techniques (always growth and learning!) with her amazing new sewing machine (I'm sure this sewing machine is smarter than my computer!) so I used this creative sewing as a jumping ground for the creation of her card.

Hanging by a thread?
I used Unity Kit of the Month stamps as well as a couple of stamps from Our Craft Lounge.  The trinket pins are from Maya Road...oh I love my Maya Road embellies!!! YUM!!  Of course the card has plenty of bling as well!!!  Love my bling too!!

NEXT!

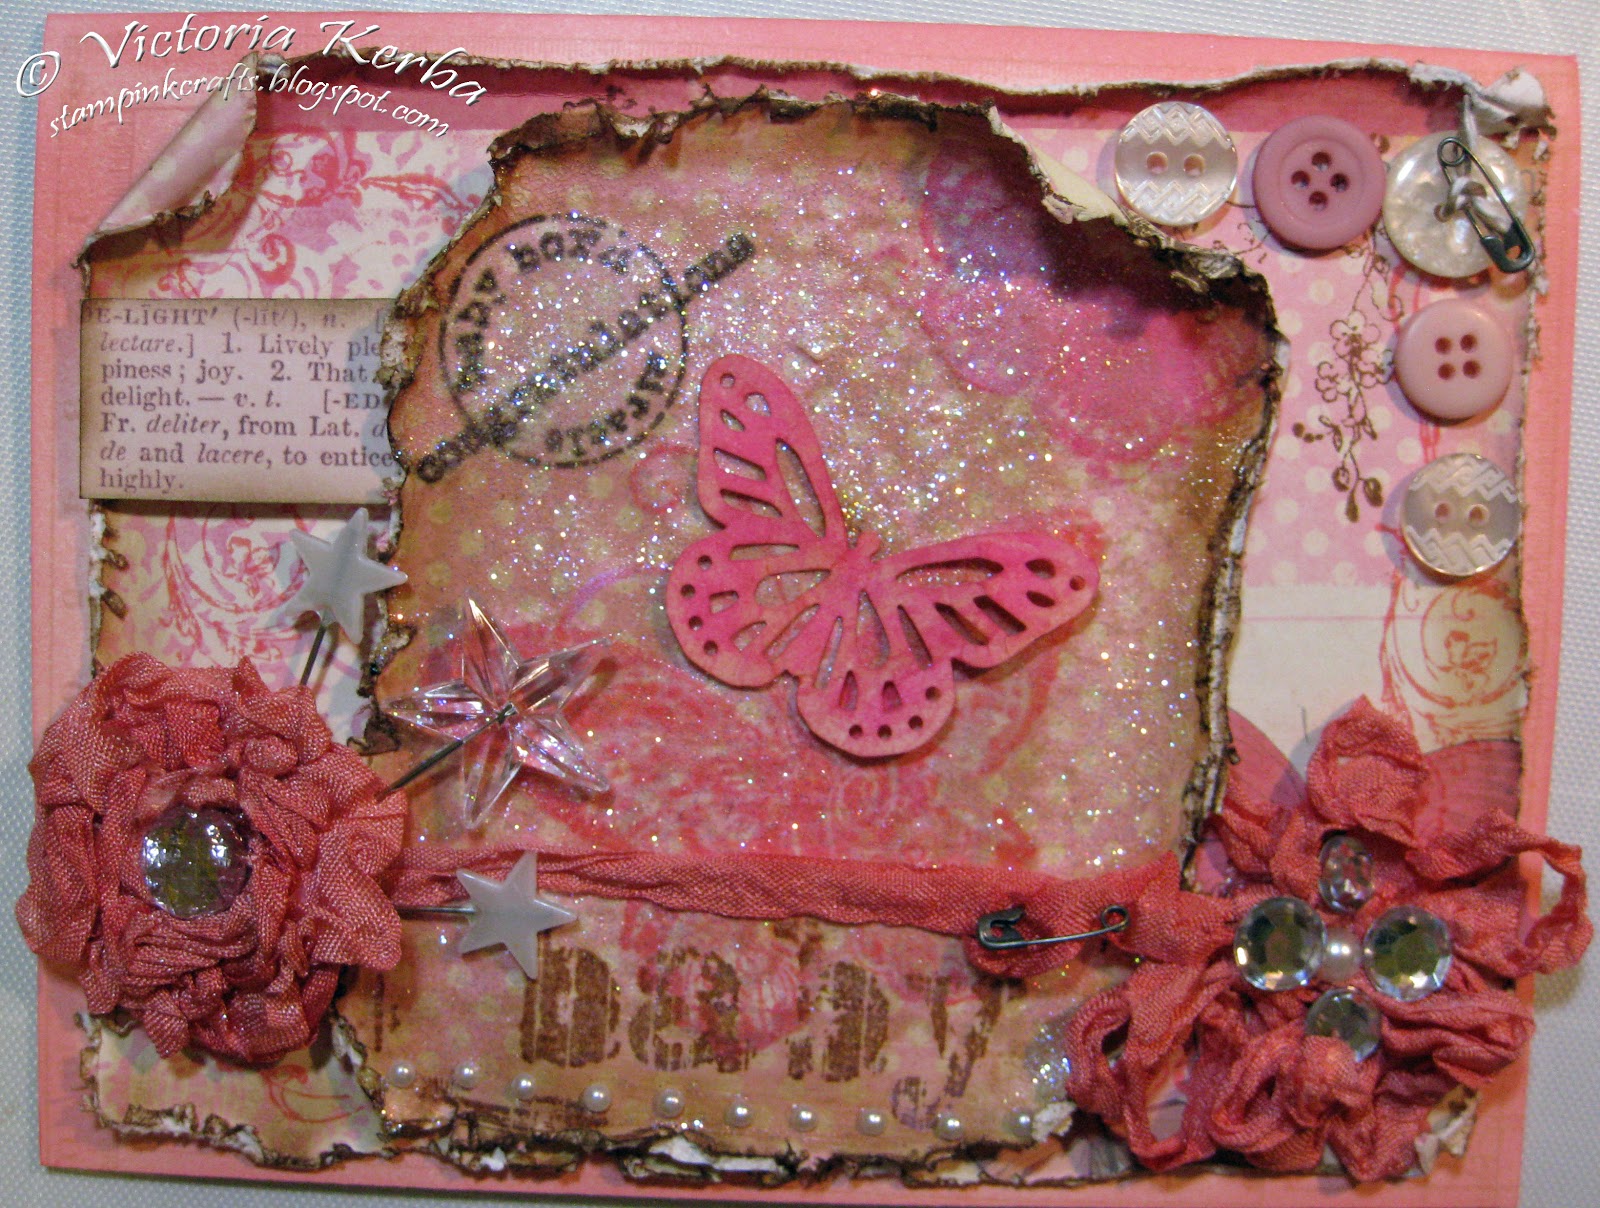
Our friends had a new baby!!! Congratulations guys!!! We are so happy to be welcoming your new addition to the world! Sweet baby Layla! What a lovely name!!  We are so pleased for you all!!

 This card was created with a set which I love by Close to My Heart.  I used a lot of trinkets and added a few Maya Road pins.  Lots of buttons, pins, ribbon glitter and a whole load of distressing with my paper distresser (Zutter Distress-it-All) and with my Tim Holtz inks! Love how it turned it.  There were many incarnations but I'm pleased with how it turned out!

 
Baby card

 
detail on ribbon
 I made the ribbon on this card.  It's rayon 'Hug Snug' seam binding.  I coloured it with my Tattered Angels Glimmer Mists in a couple of colours.  I then made the flower by twirling the ribbon around on a circle of card stock with some sookwang...or Scor Pal double sided tape.  It sticks really, really well for this type of embellishment.  I added a HUGE gem in the center for my Bling!! love my BLING!  Lots of pearls and lots of glitter on the main stamped baby panel in the center of the card.  I used Tim Holtz crackle glaze and then put on Donna Salazar Fairy Dust Glitter for the glowing glitter effect! oh I love glitter!!! Can you tell??  LOL!  The butterfly die cut is Martha Stewart.

interior of baby card
  Inside this card I used a Tim Holtz letters die and cut out the rectangles from a Spellbinders Die.  I cut layers and popped up the name.  I love how the interior turned out.  The interior wording on the Tim Holtz labels is from a Unity stamp set, as is the flourish under the interior card saying.  The butterfly stamp is also Unity.


Hubby's niece....our niece, had her second birthday!  Can't believe how time flies!!  So I made a card and a button/broach for her birthday.  She just got a 'big girl' bed and had a room makeover!  How the little ones grow!  She chose purple as her room colour!  I love that she was allowed to bring her creativity into HER room!!  So this was the colour I chose to make her card and the pin!  I cut out a large amount of die cut flowers on my Big Shot from a Sizzix die then stuck  them all together and added a pin on the back to create a bling pin she could wear on her birthday.....it was however a little late in getting to her....but I'm sure it will be in her room!

Here is the pin!


Purple birthday pin!

Outside of Birthday card for Gabriele

This card was a new challenge for me.  I decided to try something new and add a window on the front of the card to see through to the inside caption.  I used my Spellbinders die..again and created a window from a sheet of acetate.  I stamped onto the acetate with StazOn ink and then coloured in the stamped spaces with Copic markers...love the alcohol ink!!   It turned out quite well.(in my humble opinion....)  I took balloons and butterflies as the theme!  I used Unity stamps as well as some by Local King Rubber Stamp (Canadian company...love my local companies!!) balloons.  The butterflies are from a Sizzix Stampin' Up Embosslits die called Beautiful Wings. 

Front of Birthday Card


Birthday card and Pin

Interior of Card

I loved doing the interior of this card.  Unity balloons coloured in with LuminArte twinkling H20's.  Love the glimmer!!  Now it may look like I put 2010 in there... hubby saw it but it is just circles and balloons! It is not an intentional number!!  As well of course I had to add a 2 because she turned 2!!!!!

Back of Birthday Card


Well finally for THIS posting ....yes there is more......I am going to share a very simple thank you card I sent to my hubby's father and his wife to say thank you for a wonderful piece of art that we were given as a house warming gift.  The art is what hubby's MIL makes as a living.   She is an incredible artist working in Aylmer, Quebec.  (I wish she had a website....she is totally amazing!!!!!!!!!!)  Her name is Magda Hanna.  All of Magda's art is made with flower petals, natural elements and all natural pigments.  She specializes in faces and people and sees faces in all everyday things.  We enjoyed 10 days with them as they visited us in Calgary in July.  We went to the Rocky mountains and really had a great trip to Jasper Park Lodge a Fairmont hotel.....great place and I got some totally incredible photos while we traveled in the mountains.....I have been told my photos could win awards...perhaps I'll have to post a couple of the ones I took while out there.  I did get some incredible shots.  At any rate here is the card I sent to say 'thank you' for the amazing work of art that we got as a house warming gift! Thanks Kerba family!!

Thank You card...simple.

Back of Thank You card

I discovered this card...in another form....on a website while searching for how to use my Gelato's.  ..gelato's are an amazing product by Faber Castell.   I found a similar type of card on the "ilovemementos" blog....the technique I used is called watercolor stamping. Here is the video I learned the technique from.  It is a fab and fun technique and it is SUPER duper easy.  .....the card has been changed a little bit!  My own artistic license (as always) is added in.  The flower stamp is by Unity...BIG SURPRISE! and the colours are my favorite distress inks from Tim Holtz!  I had to play with my Gelato's by Faber Castell.  So many toys so little time!!!!

Well that is it for THIS post and I'll be adding another post with the  present I am making for my nieces birthday....it is a captured fairy in a jar and I also created an altered art canvas(my first so kinda weird for me...still learning...no laughing allowed!!! lol yeah okay! I can laugh!!)  Also I'll be posting about my recent ATC jams and soon enough about my art journaling and how that progresses!

Hope y'all are well and that wherever you are you are having fun and being creative!!!


Thursday, June 16, 2011

Mothers Day cards and a Birthday Card

Hi All,
It's been a long time since I've posted!! Too long in fact. I was away in Scotland and England to visit my family.  It was an arduous trip to say the least.  It was good to see my family though.  I was also quite sick for a long time.  So the time has come to begin to create again. I have been making artist trading cards like crazy.  I was behind as I was so ill before I went away to Britain.  I belong to a group called Artist Trading Cards Jams Galore on Yahoo. It is great.  We trade between three people.  Each person puts their individual stamp on the card then sends it to the next person to work on.  I'll post some of the ones I have been working on.  I have really enjoyed the free creation in them.  You never know what you will get in the mail.....WELL THERE IS ANOTHER ISSUE..... Canada is now in the midst of a Canada Post strike...well rather we had rolling city mail interruptions while the union was working on a new contract with management.....management has now locked out the workers and we have NO MORE MAIL at all.  This for ME is very frustrating!! I get a lot of my crafting supplies from online and they are shipped to me.....so no crafting supplies or ATC's for a while.  AHHHH.  Well at the very least it has inspired me to get out to my local store to buy and also to reorganize my craft room! That is a MAJOR job!! I keep buying supplies much faster than I can use them....so creating is now of the utmost importance!!
 
So now for some posting of the Mother's Day cards I created before I went to Britain.  As well as a card for my girlfriend who was my MOH last June 19 for my wedding.....which means an anniversary card will need to be made soon as well as Fathers Day cards!! Lots to create!!!


Lovely You Birthday Card  

I created this card with a doily covered in Patina Glimmer Mist.  I used the Tim Holtz  die to cut out the bird and the cage.  I keep my old plastic packages they come in so that I can use them for creating!  I made the cage with the plastic from one of the dies.  I colored the plastic with alcohol inks and then put a backing on it.  I added dew drops to the holes in the bottom.  Sticky lace was added on the side for a little bling and then I tied on some seam binding I coloured with Glimmer Mist as well. I tied the top and bottom of it with jute to pull the ribbon in a little bit. I hand colored the bird with pencil crayons.  The stamp is Unity from their Kit of the Month Club.  (great stamps!!).  I cut out the flowers from a Sizzix die and distressed them and added color with distress inks. 

side view of Lovely You

My Mums Mother's Day Card   

 This card was inspired by a card I saw in Cards magazine.  I cut out the circles from Spellbinders dies then distressed them and put a brad in the middle to keep it together.  I cut the leaves out from a Cuttlebug embossing folder and fussy cut them out. I used jute in the button and around the paper.

I stamped inside for a little drama!

this card was sent to my Mother in Law for Mother's Day! I used the same techniques as above

inside of my Mother in Laws card

back of my Mother in Laws card
Well that's it for now! This is just the first post.....more to come I'm going to make a separate post for my ATC jams.