
I have been one very, very bad blogger.......oh dear....I have soooooo much to share!!! I have not been doing much on the blog but I have certainly been creating things. I have been playing a lot recently with mixed media and am going to begin this journey by creating an art journal. I was turned on to the wonderful world of mixed media by one of my crafty pals, Sandi. Thanks Sandi!!
This world has taken me to UStream and oh boy is this a wonder of wonders! I can't believe how amazingly talented the people I have been following are. The tips,tricks and art that they broadcast and create are amazing! If you do get to UStream I am gibbrn and the crowds I follow will help you to find the videos that I have been watching. One person in particular that has caught my eye is JournalArtista.....aka Paula Phillips. Her art is just soooooo inspiring...thanks Paula!! You can find her work here.....http://www.journalartistaart.com/ Paula's site is full of amazing finds! Such creativity is just infectious!!! It will take hours of your time should you venture to her site. I have recently purchased Paula's DVD from Cloth Paper Scissors. The direct link to her instructional DVD or a direct download....no need to wait for shipping, Yeah! is here! Layered &Textured Backgrounds: Art Journaling Tips and Tricks Thanks for the inspiration Paula!!
Now on to what I have been creating.......
I made a couple of Father's Day cards.....
the first one is already posted (see prior post) it was for my Hubby's father. This one is for MY Dad!! I made a bookmark for my Dad too. He is a very avid reader sometimes with more than one book on the go at a time. I don't know anyone else who reads as prolifically! My Dad is full of many, many, many amazing facts....he reads a lot of historic non fiction books and loves to educate our whole family with his new found knowledge.
 | ||||||||||
| Front of Bookmark |
 |
| Back of Bookmark |
The back of the bookmark is just as exciting.....I thought the sayings from Unity were just PERFECT for my bookworm Dad!!! Okay..... so on the the card!
 | |
| Dad's Fathers Day Card...He's a Real Fun-gi!! LOL! |
This card was a lot of fun to make...the picture really reminded me of my Dad...or what I think he would have been like as a wee lad!! I used a lot of distressing making this card. There are many layers and gain I used a Spellbinders labels to put my image on.. This is a La Blanche stamp. I stamped it and coloured it in with Reeves water soluble wax pastels...amazing. They were lots of fun!! They are very like a water color pencil. I added Robins Nest Dew Drops. I believe they added some depth and dimension.

 |
| lots of layers on the label ....used Tim Holtz Tattered Banners die cut out...... |
 |
| side on view....you can really see the glitter I put over the image. |
I created a bag of goodies and a card for my girlfriend who was feeling under the weather. I didn't get a picture of the bag. ((boo hoo)) However I did get a picture of the card! I love it. My girlfriend, Mary Elizabeth is a very creative spirit and a very accomplished, prolific and published poet. She is now creating awesome quilts and always learning new techniques (always growth and learning!) with her amazing new sewing machine (I'm sure this sewing machine is smarter than my computer!) so I used this creative sewing as a jumping ground for the creation of her card.
 | |
| Hanging by a thread? |
NEXT!
Our friends had a new baby!!! Congratulations guys!!! We are so happy to be welcoming your new addition to the world! Sweet baby Layla! What a lovely name!! We are so pleased for you all!!
This card was created with a set which I love by Close to My Heart. I used a lot of trinkets and added a few Maya Road pins. Lots of buttons, pins, ribbon glitter and a whole load of distressing with my paper distresser (Zutter Distress-it-All) and with my Tim Holtz inks! Love how it turned it. There were many incarnations but I'm pleased with how it turned out!
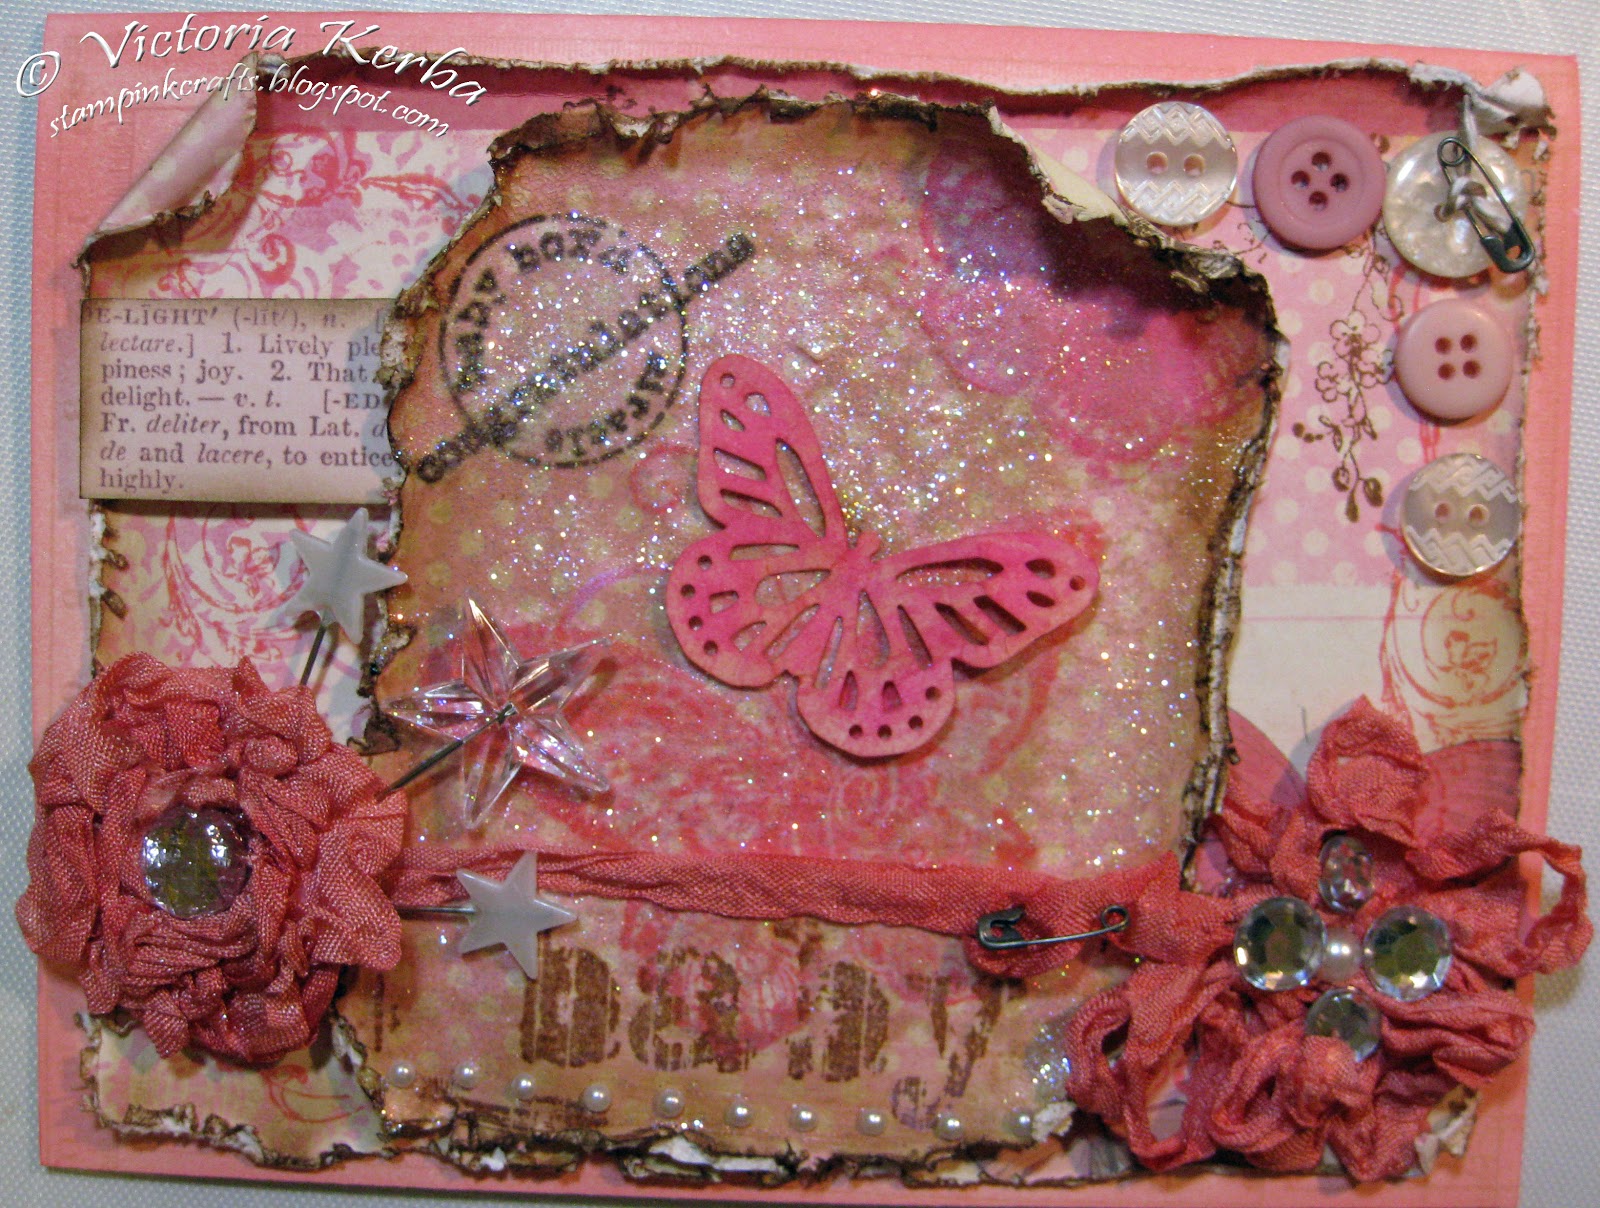 | |||||||
| Baby card |
 | ||||||||||||
| detail on ribbon |
 | |
| interior of baby card |
Hubby's niece....our niece, had her second birthday! Can't believe how time flies!! So I made a card and a button/broach for her birthday. She just got a 'big girl' bed and had a room makeover! How the little ones grow! She chose purple as her room colour! I love that she was allowed to bring her creativity into HER room!! So this was the colour I chose to make her card and the pin! I cut out a large amount of die cut flowers on my Big Shot from a Sizzix die then stuck them all together and added a pin on the back to create a bling pin she could wear on her birthday.....it was however a little late in getting to her....but I'm sure it will be in her room!
Here is the pin!
 |
| Purple birthday pin! |
 |
| Outside of Birthday card for Gabriele |
This card was a new challenge for me. I decided to try something new and add a window on the front of the card to see through to the inside caption. I used my Spellbinders die..again and created a window from a sheet of acetate. I stamped onto the acetate with StazOn ink and then coloured in the stamped spaces with Copic markers...love the alcohol ink!! It turned out quite well.(in my humble opinion....) I took balloons and butterflies as the theme! I used Unity stamps as well as some by Local King Rubber Stamp (Canadian company...love my local companies!!) balloons. The butterflies are from a Sizzix Stampin' Up Embosslits die called Beautiful Wings.
 |
| Front of Birthday Card |
 |
| Birthday card and Pin |
 |
| Interior of Card |
I loved doing the interior of this card. Unity balloons coloured in with LuminArte twinkling H20's. Love the glimmer!! Now it may look like I put 2010 in there... hubby saw it but it is just circles and balloons! It is not an intentional number!! As well of course I had to add a 2 because she turned 2!!!!!
 |
| Back of Birthday Card |
Well finally for THIS posting ....yes there is more......I am going to share a very simple thank you card I sent to my hubby's father and his wife to say thank you for a wonderful piece of art that we were given as a house warming gift. The art is what hubby's MIL makes as a living. She is an incredible artist working in Aylmer, Quebec. (I wish she had a website....she is totally amazing!!!!!!!!!!) Her name is Magda Hanna. All of Magda's art is made with flower petals, natural elements and all natural pigments. She specializes in faces and people and sees faces in all everyday things. We enjoyed 10 days with them as they visited us in Calgary in July. We went to the Rocky mountains and really had a great trip to Jasper Park Lodge a Fairmont hotel.....great place and I got some totally incredible photos while we traveled in the mountains.....I have been told my photos could win awards...perhaps I'll have to post a couple of the ones I took while out there. I did get some incredible shots. At any rate here is the card I sent to say 'thank you' for the amazing work of art that we got as a house warming gift! Thanks Kerba family!!
 |
| Thank You card...simple. |
 |
| Back of Thank You card |
I discovered this card...in another form....on a website while searching for how to use my Gelato's. ..gelato's are an amazing product by Faber Castell. I found a similar type of card on the "ilovemementos" blog....the technique I used is called watercolor stamping. Here is the video I learned the technique from. It is a fab and fun technique and it is SUPER duper easy. .....the card has been changed a little bit! My own artistic license (as always) is added in. The flower stamp is by Unity...BIG SURPRISE! and the colours are my favorite distress inks from Tim Holtz! I had to play with my Gelato's by Faber Castell. So many toys so little time!!!!
Well that is it for THIS post and I'll be adding another post with the present I am making for my nieces birthday....it is a captured fairy in a jar and I also created an altered art canvas(my first so kinda weird for me...still learning...no laughing allowed!!! lol yeah okay! I can laugh!!) Also I'll be posting about my recent ATC jams and soon enough about my art journaling and how that progresses!
Hope y'all are well and that wherever you are you are having fun and being creative!!!

No comments:
Post a Comment